
作成したアプリケーション
GraphQLの学習用のサンプルアプリケーションです。
フロントエンドは Next.js & Apollo Client 、サーバーサイドは Nest.js & Prisma を利用して作成しています。
主な機能
- ログイン/ログアウト
- 会員登録
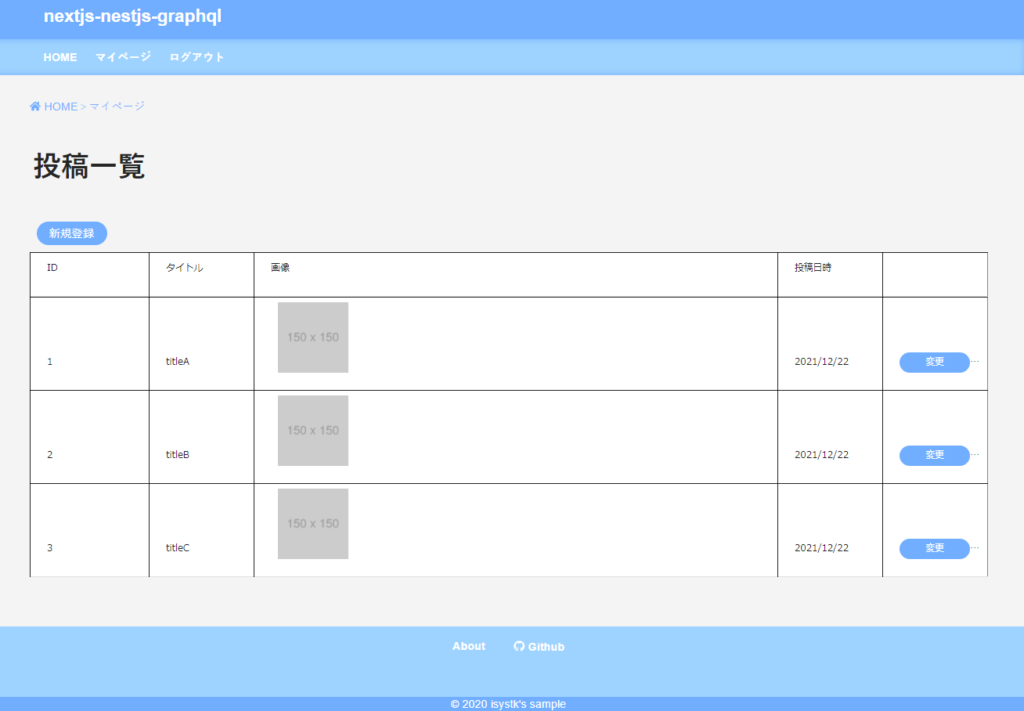
- 投稿一覧
- 投稿詳細
- マイページ(一覧・登録・更新・削除)
利用している技術
- Next.js (React16)
- Redux Tool Kit
- Typescript
- Apollo Client
- Nest.js
- Prisma
- GraphQL
Apollo Client を利用した認証機能の実装
Client側 では、Http Header の authorization に token を設定してサーバー側に渡すようにしています。
utilities/api.ts
import {
  ApolloClient,
  HttpLink,
  ApolloLink,
  InMemoryCache,
  concat,
} from '@apollo/client'
import Env from '../common/env/'

const httpLink = new HttpLink({ uri: Env.externalEndpointUrl })

const authMiddleware = new ApolloLink((operation, forward) => {
  // add the authorization to the headers
  operation.setContext(({ headers = {} }) => ({
    headers: {
      ...headers,
      authorization: 'Bearer ' + localStorage.getItem('token') || null,
    },
  }))
  return forward(operation)
})

const client = new ApolloClient({
  cache: new InMemoryCache(),
  link: concat(authMiddleware, httpLink),
})

export default client
Server側 では、Http Header の authorization から token を取得して JWT で検証しています。有効なトークンの場合のみ、GraphQLの処理が実行されるようにしています。
auth.service.ts
import { Injectable } from '@nestjs/common';
import { PrismaService } from 'src/prisma.service';
import { AuthenticationError } from 'apollo-server-core';
import { ApolloServer, UserInputError } from 'apollo-server-express';
import { User } from './user/models/user.model';
import * as bcrypt from 'bcrypt';
import * as jwt from 'jsonwebtoken';

type JWT_TOKEN = {
  id: number
  email: string
}

const initial = {
  secret: 'my_secret',
  expiresIn: '24h'
}

@Injectable()
export class AuthService {
  constructor(
      private prisma: PrismaService
  ) {}

  // パスワードをハッシュ化する
  public generatePasswordHash = async (password: string) => {
      const saltRounds = 10;
      return await bcrypt.hash(password, saltRounds);
  }

  // パスワードをチェックする
  public validatePassword = async (user: User, password: string) => {
      return await bcrypt.compare(password, user.password);
  }

  // ユーザトークンを生成する
  public createToken = async (user: User) => {
      const { id, email }: JWT_TOKEN = user;
      return await jwt.sign({ id, email }, initial.secret, { expiresIn: initial.expiresIn });
  }

  // JWTトークンを公開鍵で検証する
  public verifyToken = async (token: string) => {
      return await jwt.verify(token, 'my_secret', async (err: any, decoded: JWT_TOKEN) => {
          if (err) {
              throw new AuthenticationError('Invalid password. ' + err);
          } else {
              // OK
              console.log(`OK: decoded.id=[${decoded.id}], email=[${decoded.email}]`);

              const user = await this.prisma.user.findUnique({where: {email: decoded.email}});
              if (!user) throw new UserInputError('No user found with this login credentials.');

              return user
          }
      })
  }
}
auth/guards/auth.guard.ts
import { Injectable, CanActivate, ExecutionContext } from '@nestjs/common';
import { AuthService } from 'src/auth.service';
import { GqlExecutionContext } from '@nestjs/graphql';
import { AuthenticationError } from 'apollo-server-core';

@Injectable()
export class GqlAuthGuard implements CanActivate {
  constructor(
    private auth: AuthService
  ) {}

  async canActivate(context: ExecutionContext): Promise<boolean> {
      const req = this.getRequest(context);

      // headerからtokenを取得
      const authHeader = req.headers.authorization as string;
      if (!authHeader) {
          throw new AuthenticationError('Authorization header not found.');
      }
      const [type, token] = authHeader.split(' ');
      if (type !== 'Bearer') {
          throw new AuthenticationError(`Authentication type \\'Bearer\\' required. Found \\'${type}\\'`);
      }

      // JWTトークンを公開鍵で検証する
      await this.auth.verifyToken(token);

      return true
  }

  private getRequest = (context: ExecutionContext) => {
    const ctx = GqlExecutionContext.create(context);
    return ctx.getContext().req;
  }

}
post/post.resolver.ts
@Mutation(() => Post)
@UseGuards(GqlAuthGuard)
async createPost(
      @Args('title') title: string,
      @Args('description') description: string,
      @Args('photo') photo: string,
      @Args('authorId') authorId: number,
) {
  return this.prisma.post.create({ data: { title, description, photo, authorId } });
}
開発環境の構築
ソースコード
MIT ライセンスにてコードを公開していますのでご利用下さいませ。
https://github.com/isystk/nextjs-nestjs-graphql
ディレクトリ構造
.
├── docker/
│   ├── mysql/
│   ├── nestjs/
│   │   └── app/ (Nest.js のソースコード)
│   │       ├── prisma/
│   │       ├── src/
│   │       └── test/
│   └── docker-compose.yml
├── src/ (Next.js のソースコード)
│   ├── @types/
│   ├── auth/
│   ├── common/
│   ├── components/
│   ├── pages/
│   ├── store/
│   ├── styles/
│   └── utilities/
└── test/
操作用シェルスクリプトの使い方
Usage:
  dc.sh [command] [<options>]

Options:
  stats|st                 Dockerコンテナの状態を表示します。
  init                     Dockerコンテナ・イメージ・生成ファイルの状態を初期化します。
  start                    すべてのDaemonを起動します。
  stop                     すべてのDaemonを停止します。
  mysql login              MySQLデータベースにログインします。
  mysql export <PAHT>      MySQLデータベースのdumpファイルをエクスポートします。
  mysql import <PAHT>      MySQLデータベースにdumpファイルをインポートします。
  mysql restart            MySQLデータベースを再起動します。
  server login             Nest.jsのサーバーにログインします。
  server start             Nest.jsを起動します。
  prisma studio            Prisma Studio を起動します。
  prisma migrate           Prisma の Migrate を実行します。
  --version, -v     バージョンを表示します。
  --help, -h        ヘルプを表示します。
起動方法
# 下準備
$ ./dc.sh init

# Dockerを起動する
$ ./dc.sh start

# データベースとPHPが立ち上がるまで少し待ちます。(初回は5分程度)

# MySQLにログインしてみる
$ ./dc.sh mysql login

# DBのマイグレーション
$ ./dc.sh prisma migrate

# サーバーの起動
$ ./dc.sh server start

# Dockerを停止する場合
$ ./dc.sh stop
GraphQL

# 以下のように必要なフィールドのみを指定してデータを取得できます。

query {
  getPosts {
    id
    title
    description
    photo
    createdAt
    updatedAt
    authorId
  }
}
Prisma
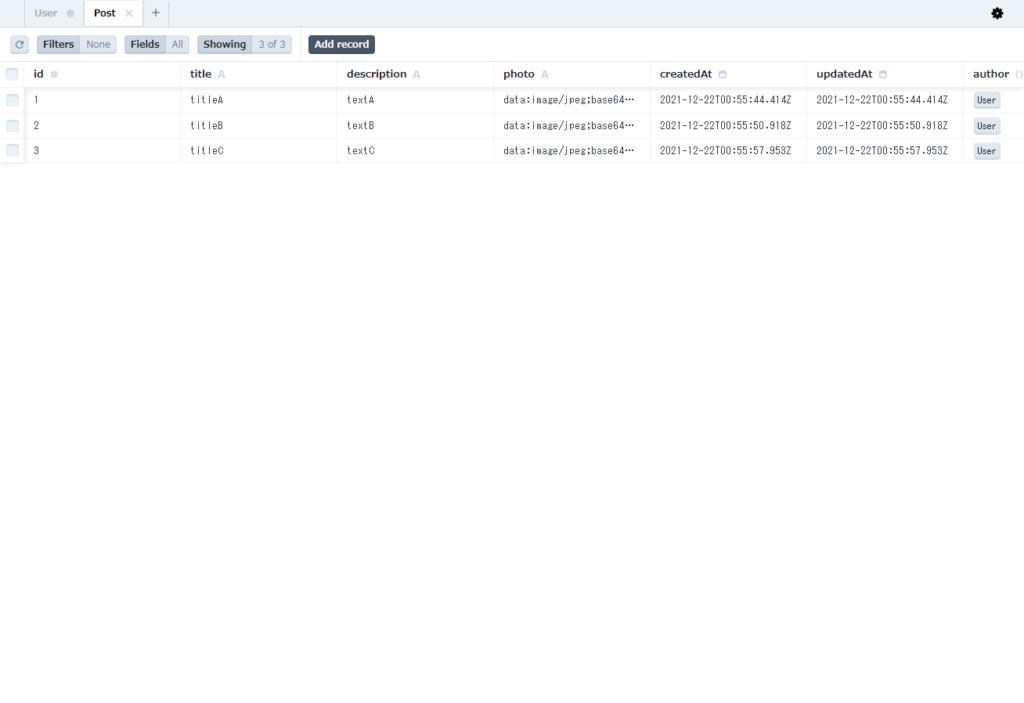
$ ./dc.sh server prisma
関連記事


Warning: Undefined variable $aria_req in /home/r2383233/public_html/blog.isystk.com/wp-content/themes/isystk-blog-blue/comments.php on line 21
Warning: Undefined variable $html5 in /home/r2383233/public_html/blog.isystk.com/wp-content/themes/isystk-blog-blue/comments.php on line 24
Warning: Undefined variable $aria_req in /home/r2383233/public_html/blog.isystk.com/wp-content/themes/isystk-blog-blue/comments.php on line 24
Warning: Undefined variable $aria_req in /home/r2383233/public_html/blog.isystk.com/wp-content/themes/isystk-blog-blue/comments.php on line 27